
ArmUno 2.0 Robotic Arm Build Tutorial
This is the assembly tutorial for the Arm.Uno 2.0 Robotic Arm Kit. Watch the full assembly guide video or view the specific parts videos. fastener identification and location charts below for help with your robot building adventure. Please contact us Via the kit help email address found on your invoice if you cant figure something out or have a question or suggestions to improve it.
ArmUno 2.0 Robotic Arm Kit Assembly Guide Full Video
Watch the video to see the ArmUno 2.0 being built from un-boxing to final assembly. Shows order of assembly with fastener size and location call outs as well as servo motor shaft to link timing and other helpful tips.
Connecting servo motors with your Arduino or Robotio control board - Servo IO Board Wiring Diagrams.
Purchase your own ready to assemble robot kit and view available options and accessories.
Robotic Arm Sub-Assemblies and Color Coded Parts Diagram + Video Navigation
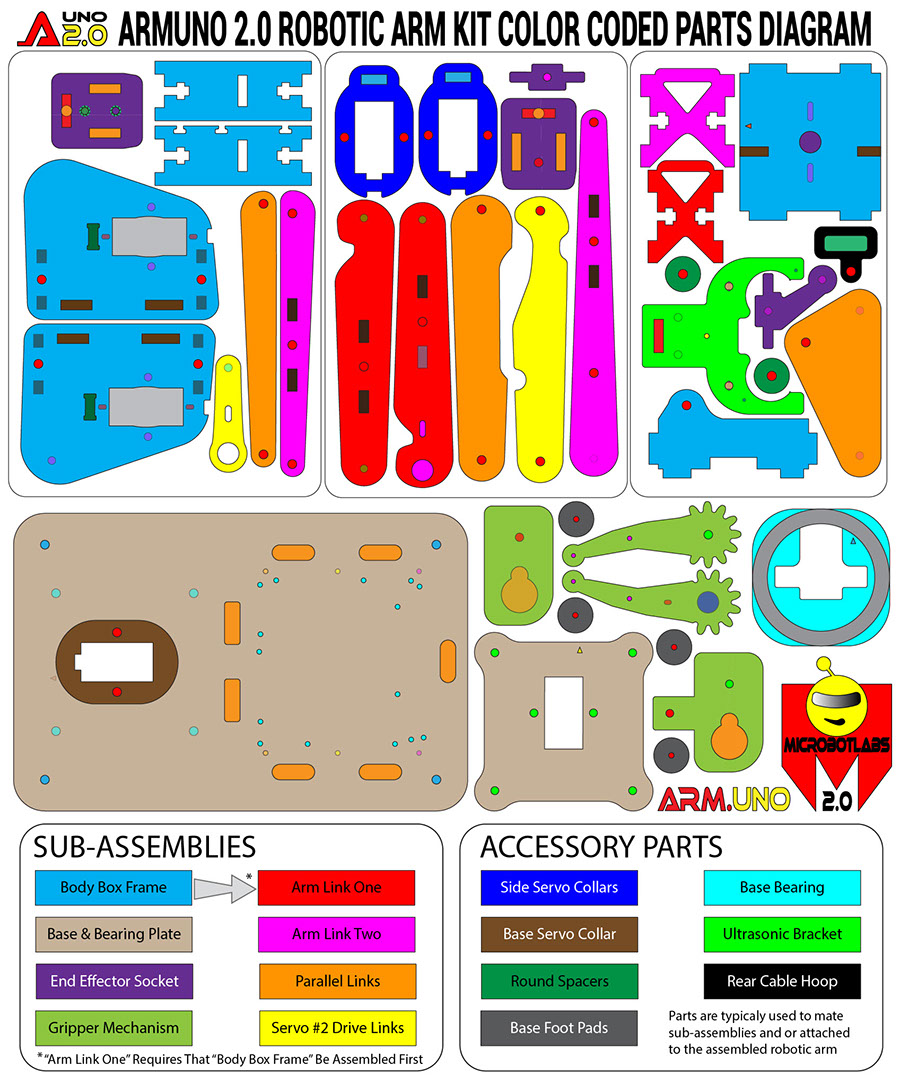
Body Box Frame
Base and Bearing Plate
End Effector Socket
Gripper Mechanism
Arm Link One
Arm Link Two
Parallel Links
Servo #2 Drive Links
Base Servo Collar
Base Bearing
Ultrasonic Sensor Bracket
Rear Cable Hoop
*
*
*
*
*
*
*
*
*
*
*
*
* Interactive ArmUno 2.0 Assembly Video Navigation Buttons. Click the Color Coded Parts and Subassembly Buttons of Interest to View Assembly Video of that Item. Click again to Hide the Video and View the ArmUno 2.0 Parts Diagram Again.
Sub-assemblies allow us to concentrate on a few of the robot arms many pieces at a time. they also give us more recognizable pieces to associate with images of the fully assembled arm. with one exception (red*) most of the pieces in the color coded chart above can be assembled to their mating parts of the same color in almost any order you choose. a few pieces (Accessory Parts) are used to mate sub-assemblies and or attached to the fully assembled robotic arm.
TRY IT!
Click on the buttons to view sub assembly videos ----->
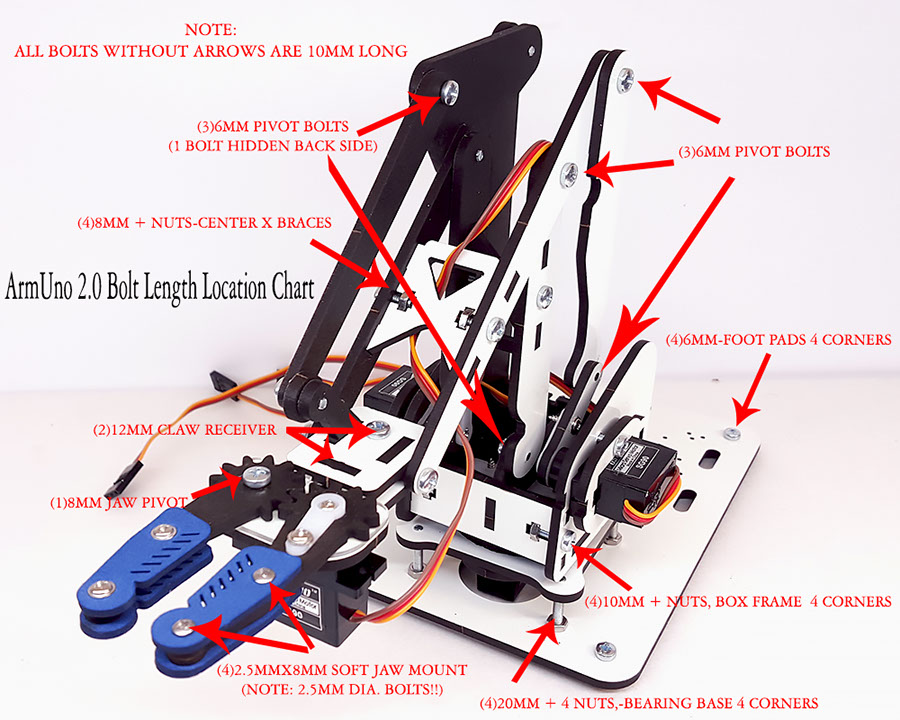
ArmUno 2.0 New Fastener Set Size and Location Guide
NEW 2.0 FASTENER SET. So some of the V1 bolts wont be the same even for the same location. use the following bolt length location chart as a guide. in general since the material thickness is 3mm the bolt length will be equal or grater than the number of material thickness it has to go through.

ROBOTIO NANO Brain Board Servo & Sensor Interface Quick Start Guide Video
For robotic arm kits purchased with the ROBOTIO servo control board option. after mechanical assembly of your robotic arm is complete you can hook up the servos and connect to MeCon software to start programing your robot. the above video guide will get you started. also good for a basic introduction to the MeCon software.
The Gripper Mechanism (the claw)
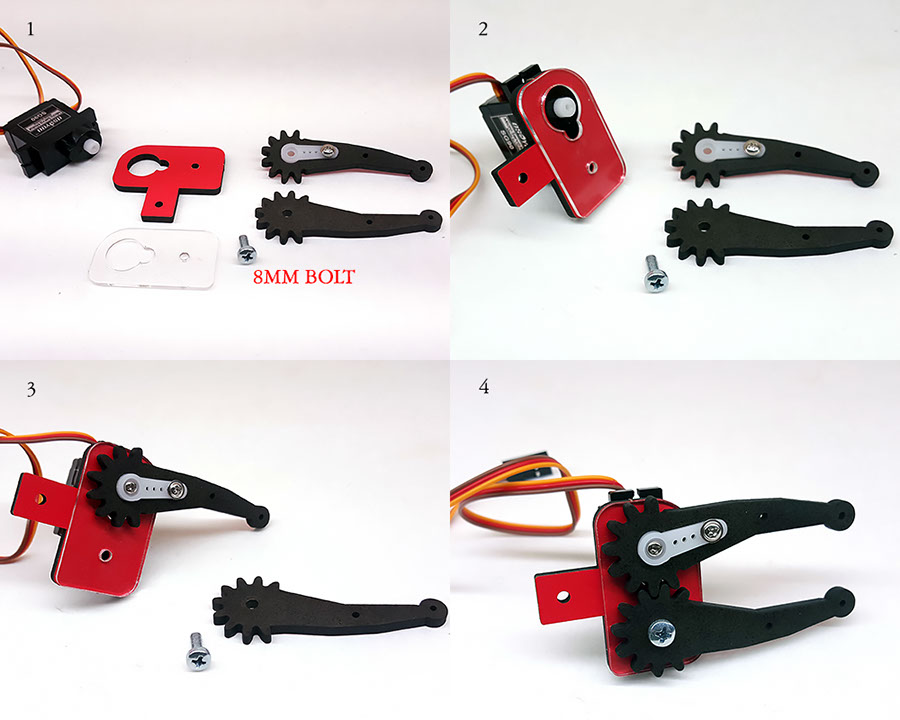
The claw actuator has bean greatly simplified and a more versatile mounting system is used that allows the gripper to be quickly oriented into a vertical position. this also will allow a convenient way to add addition end effector tooling such as alternate grippers and sensor brackets. the following images shows the new gripper and its mating receiver being assembled.
The Gripper Receiver (End Effector Tool Holder)

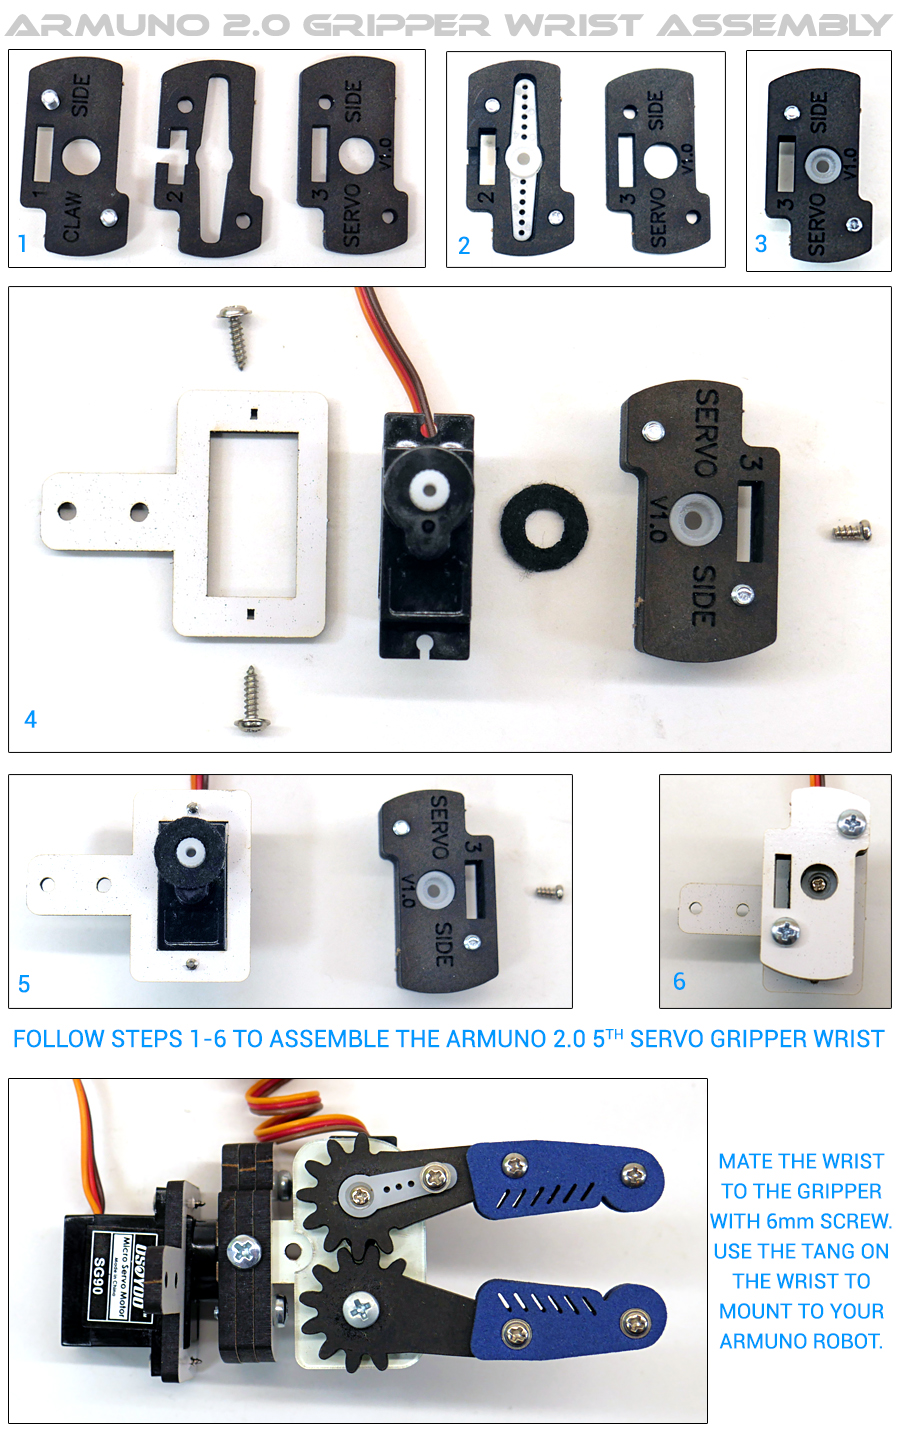
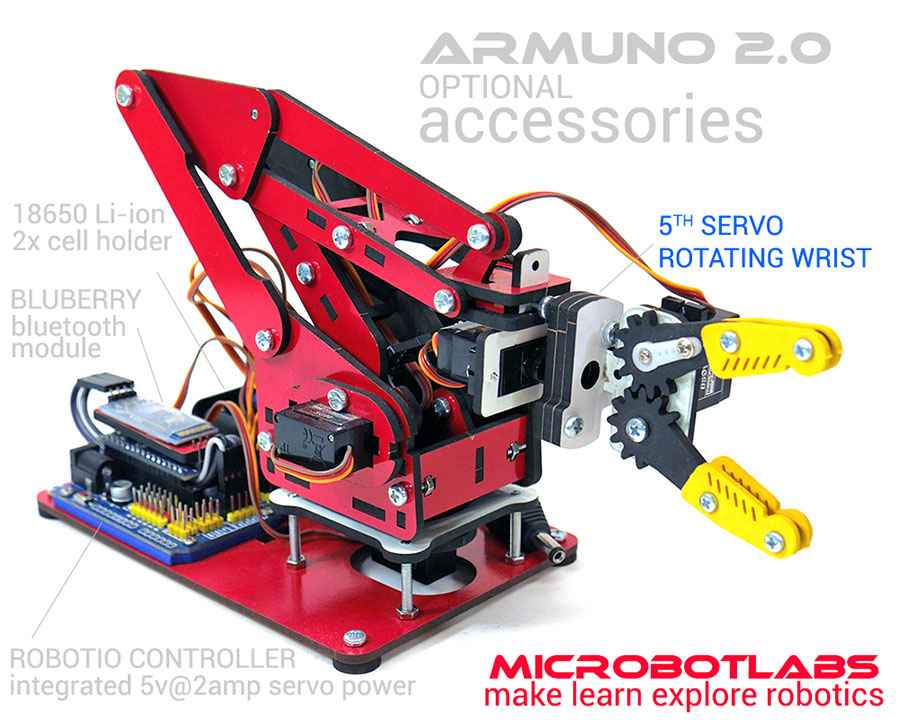
Optional 5th Servo Gripper Rotating Wrist Assembly Tutorial
Add 180 deg of rotation to your ArmUno 2.0 robotic Arms Gripper (Jaws) with the Gripper Wrist Kit
Steps:
1) Prepare the stackable wrist body - Place two 10mm screws in part 1 as shown.
2) Stack part 2 onto part 1 - Place servo horn as shown with servo shaft side up.
3) Place part 3 onto part 2 - Tighten 10mm screws so that all parts fit with no gap between them.
4) Prepare servo mount, servo shaft spacer and wrist body to be assembled.
5) Attach servo mount with 2 servo screws as shown.
6) Place servo shaft spacer over shaft and attach the servo horn (embedded inside wrist body) with servo shaft screw as shown. adjust for smooth rotation.
You can now mount the standard ArmUno gripper jaws to the wrist. Mount the assembly to your robotic arm the same way as the standalone gripper in either vertical or horizontal orientation. you can adjust the wrists 180 rotation start and stop points by adjusting the servo shaft to servo horn timing in step 6.
Control the 5th wrist servo with MeCon Pro software by enabling an extra servo control slider found on the "Aux Servos" tab after connecting the servo to correct signal and power pins on your Arduino board and uploading "Code Sample (5servo)" code sketch found on MeCons "Recourses " menu.
Microbotlabs works hard to make quality tutorials and guides for our robotic kits. We welcome any questions or suggestions, Please contact us if you need any assistance with your kit via the special kit help email address included with your kit.
Thanks!

Copyright © MICROBOTLABS
Our Make & Learn Brands: MICROBOTLABS™ ARM.UNO™ ROBOTIO™ PROTIO™ ARMIO™ ANITRON™ ANITRONIC™ ARM.ONE™

